Get started / Build your first Factory
Build your first Factory
Turn GitHub issues into a working Next.js application and deploy it with Vercel.

Starting with the one demo application and will be using SuperPlane to complete two focused issues. Then review and merge the changes and deploy the application with Vercel.
This guide uses the SuperPlane Demo repository. Instead of asking different agent to solve the issues in one run, you will send small pieces of engineering work through the same factory to get the desired result.
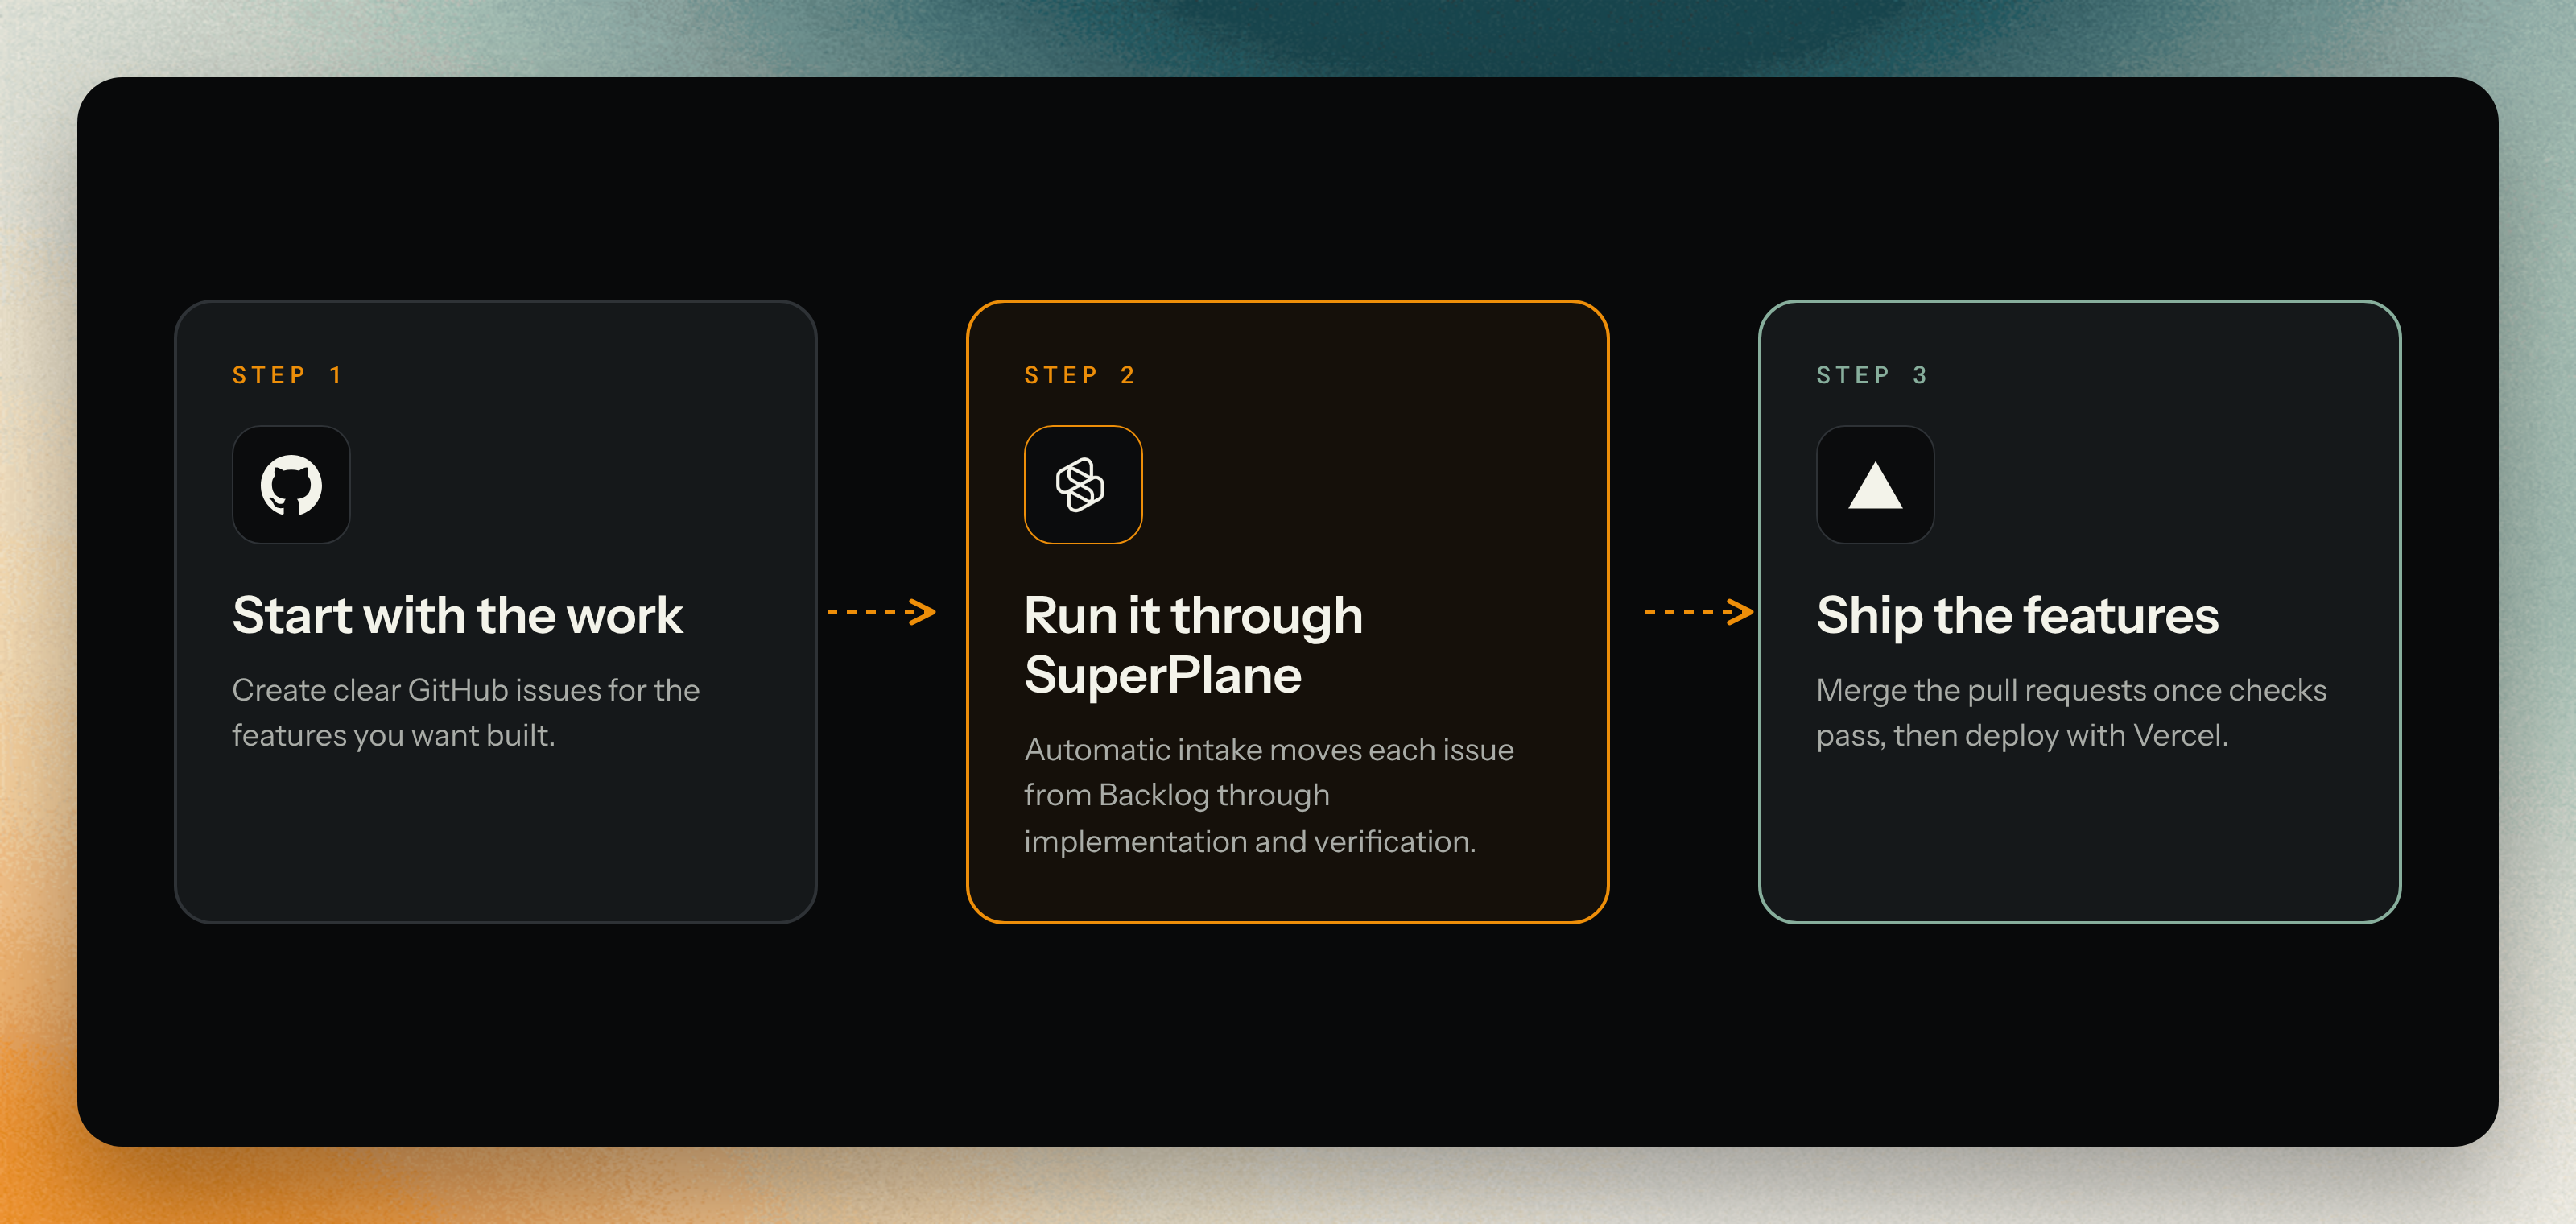
By the end, your work will have followed this path:
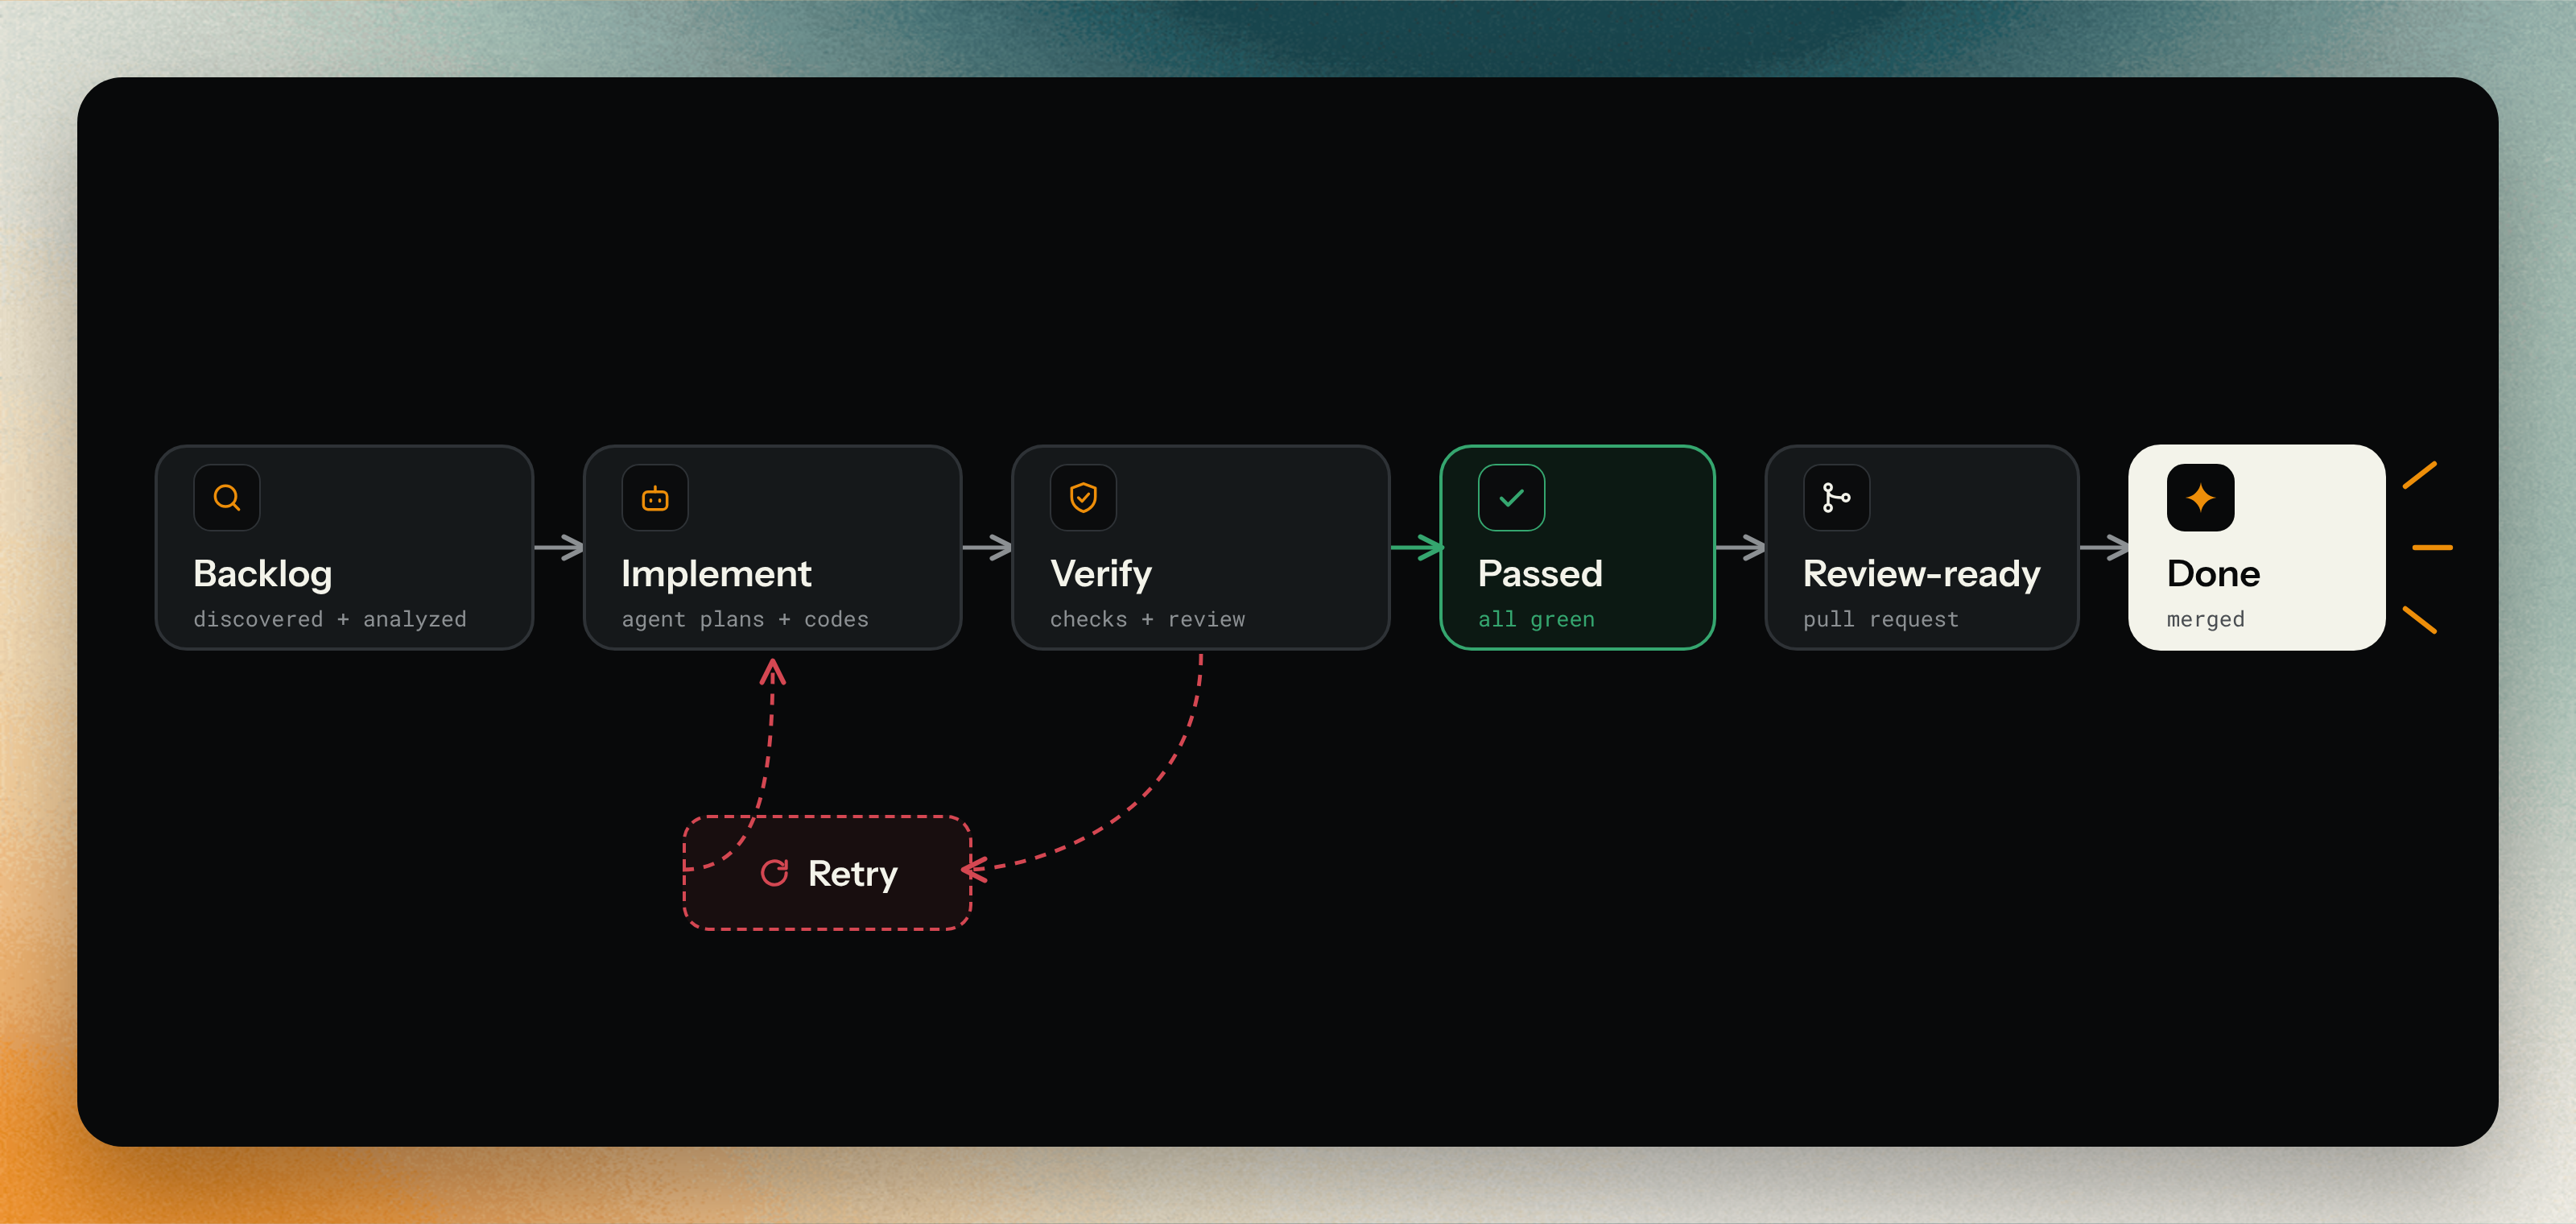
What you’ll do
Section titled “What you’ll do”Make four small improvements to the demo homepage:
- Update the text: Introduce the SuperPlane demo in place of the default Next.js instructions.
- Fix dark mode: Make text readable and give the page and content area distinct background colors.
- Fit buttons on mobile: Keep buttons from overflowing on narrow screens.
- Highlight keyboard focus: Show a visible outline when users tab to a link.
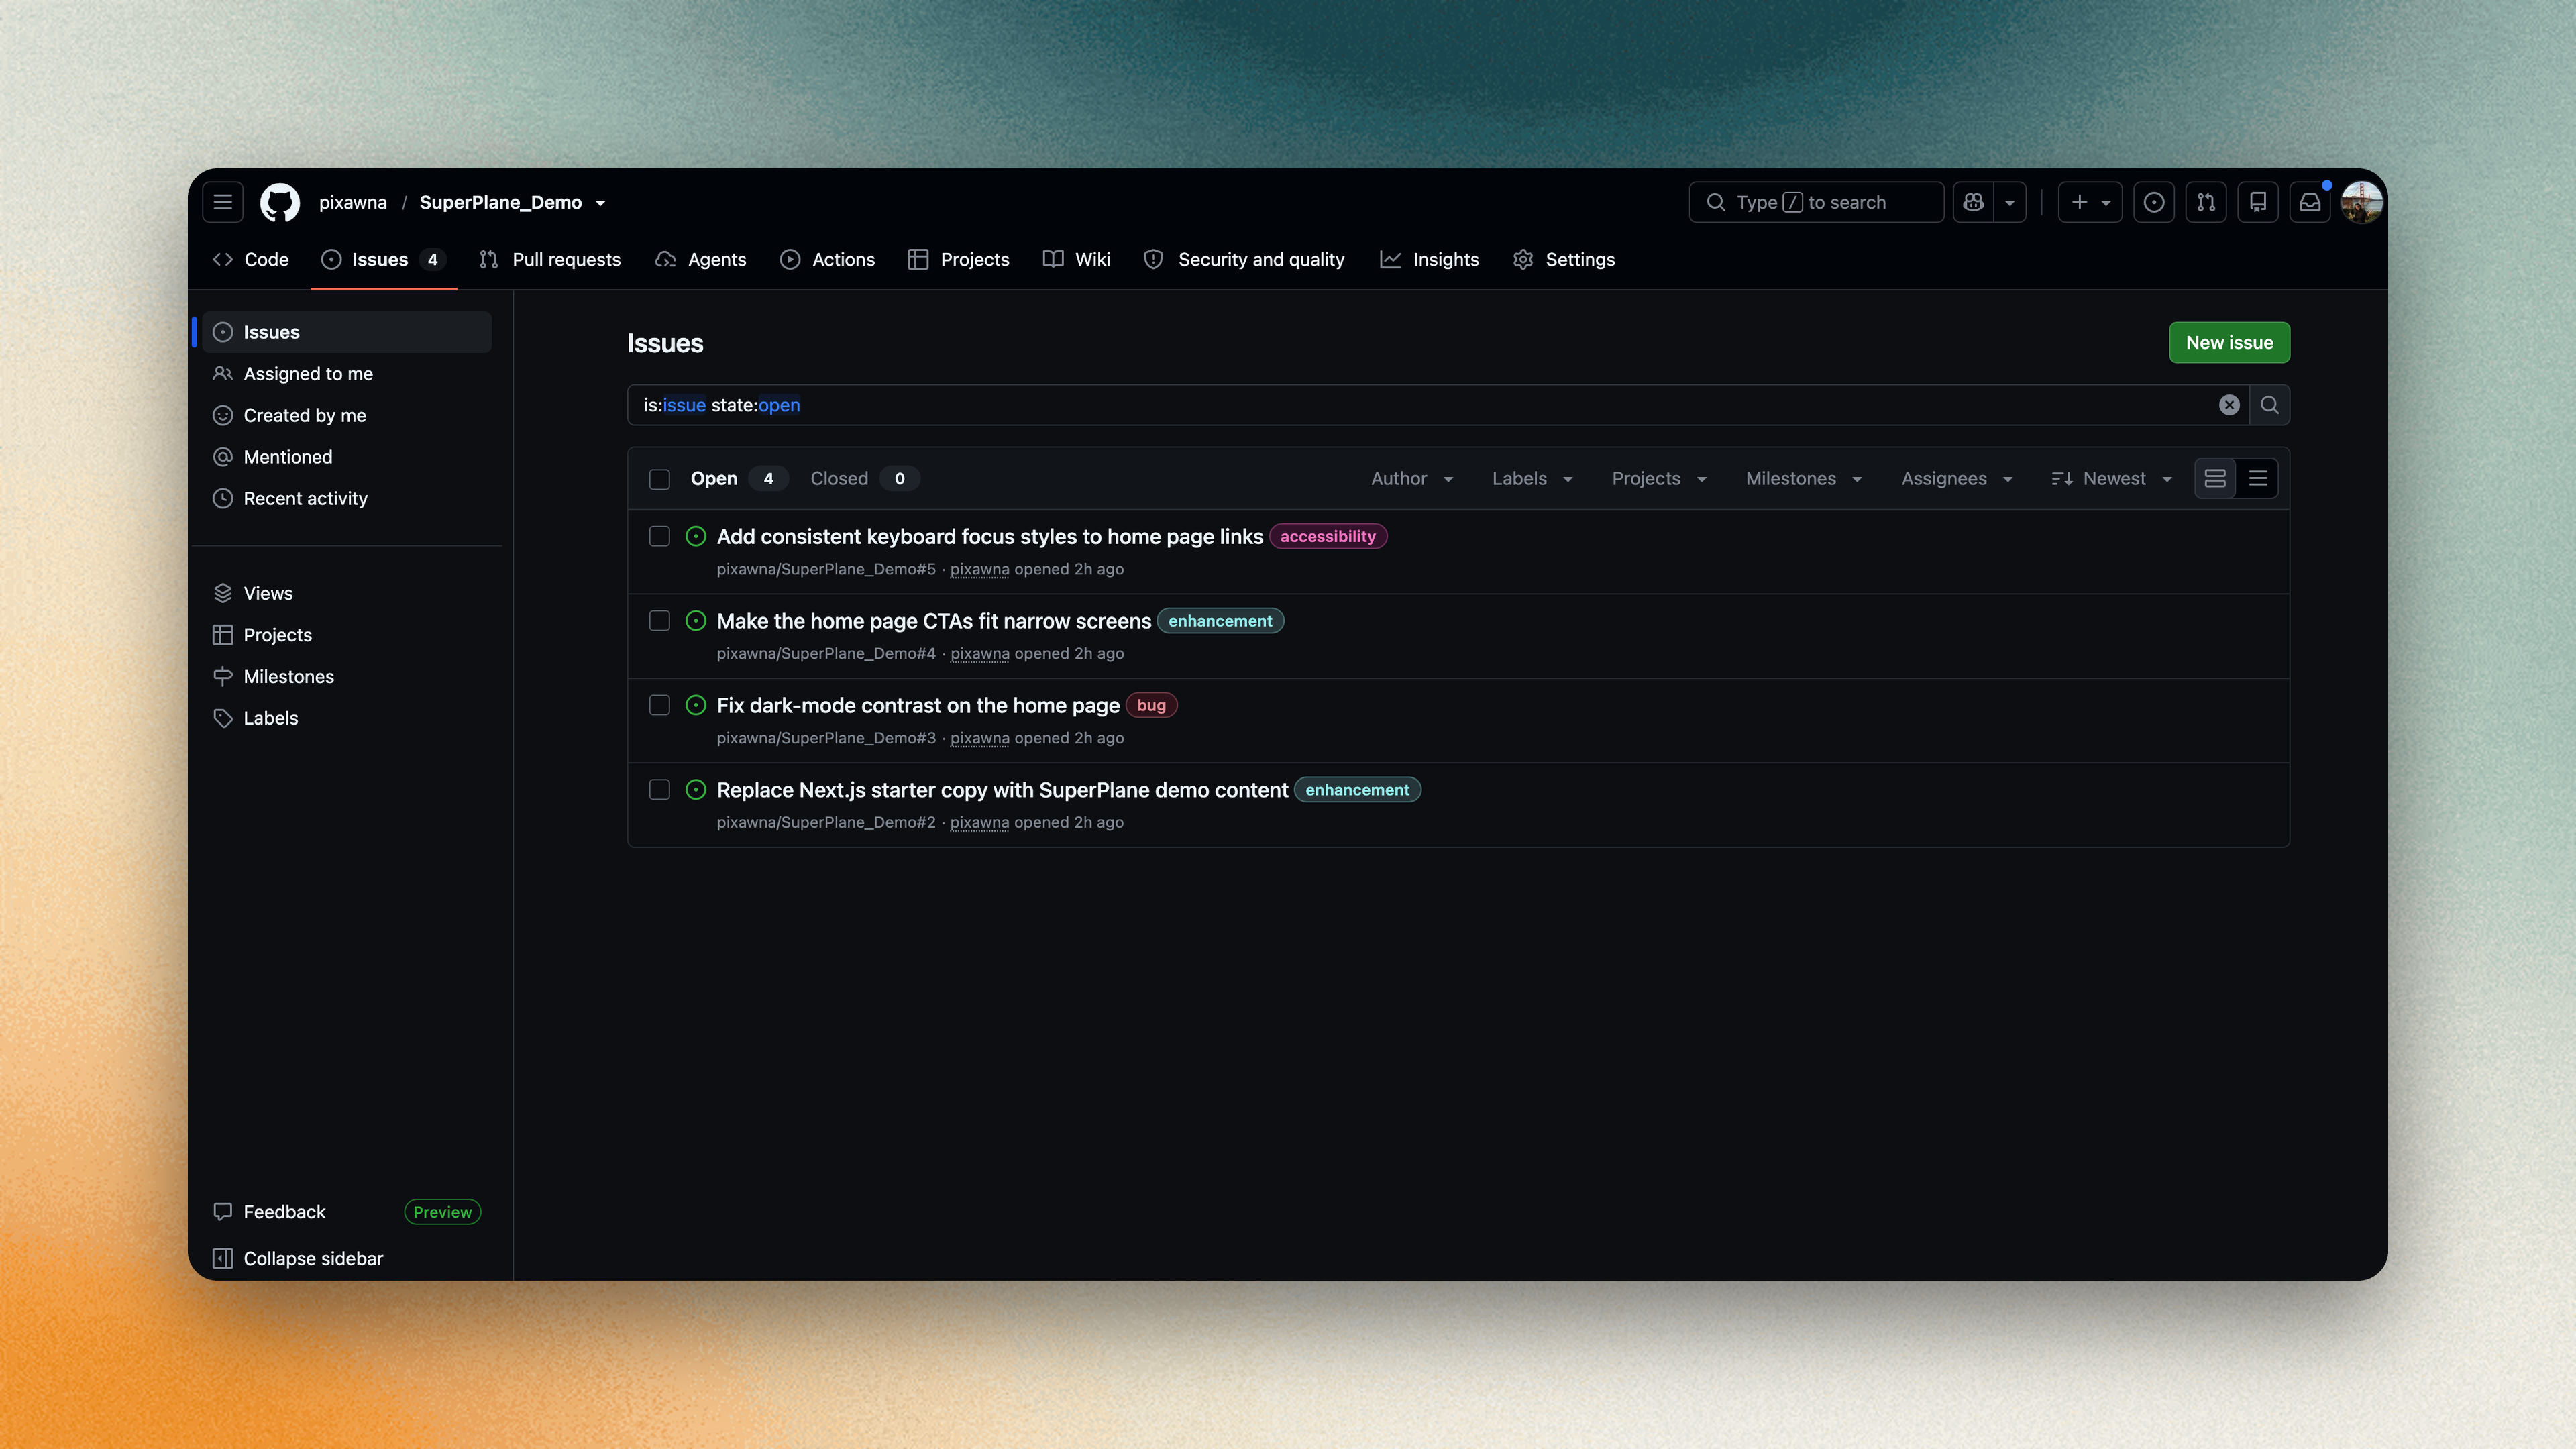
Create one GitHub issue per task. This gives the factory a clear change to make and check. In this walkthrough, we’ll complete the first two tasks.
1. Let’s Start with the repository
Section titled “1. Let’s Start with the repository”Open the SuperPlane Demo repository. The repository already contains a starter Next.js application and focused issues. Use your own copy of the project to follow along and make sure its issues are available for SuperPlane to import.
2. Connect the repository to SuperPlane
Section titled “2. Connect the repository to SuperPlane”Create your SuperPlane account and Complete the onboarding steps to bring the project into SuperPlane. Still have issues? No worries we got you covered, complete the Quickstart first or you can follow the below video

Once connected, the issues you just created should begin appearing in the Backlog.
3. Start the first issue
Section titled “3. Start the first issue”Open Backlog and select Make the home page CTAs fit narrow screens. Before an agent changes code, SuperPlane analyzes whether the task is fully Automatable or not through confidence score.

Review the task context. When the scope and expected result look right, select Start.
4. Watch the factory implement it
Section titled “4. Watch the factory implement it”Starting the task moves it into Implement. The configured coding agent works on the repository while the factory controls the process around it. You do not need to describe these operational steps in every issue. The implementation process belongs to the factory. Check how’s the work is moving end-to-end from backlog to implementation phase.

Even if you wanted you can change the model based at each step shown in the video to performs the work. The automation steps define what the agent does during implementation. Concurrency controls how much work can run at the same time.
5. Verify the first change
Section titled “5. Verify the first change”When implementation completes, the task moves to Verify. Open the linked pull request and confirm that the application builds and it did the same we expected to get it done.